Getting Started
1. Create an Account
Register in just a few clicks. You can use Google sign-in without extra passwords or register with your email and password of choice.
Start Now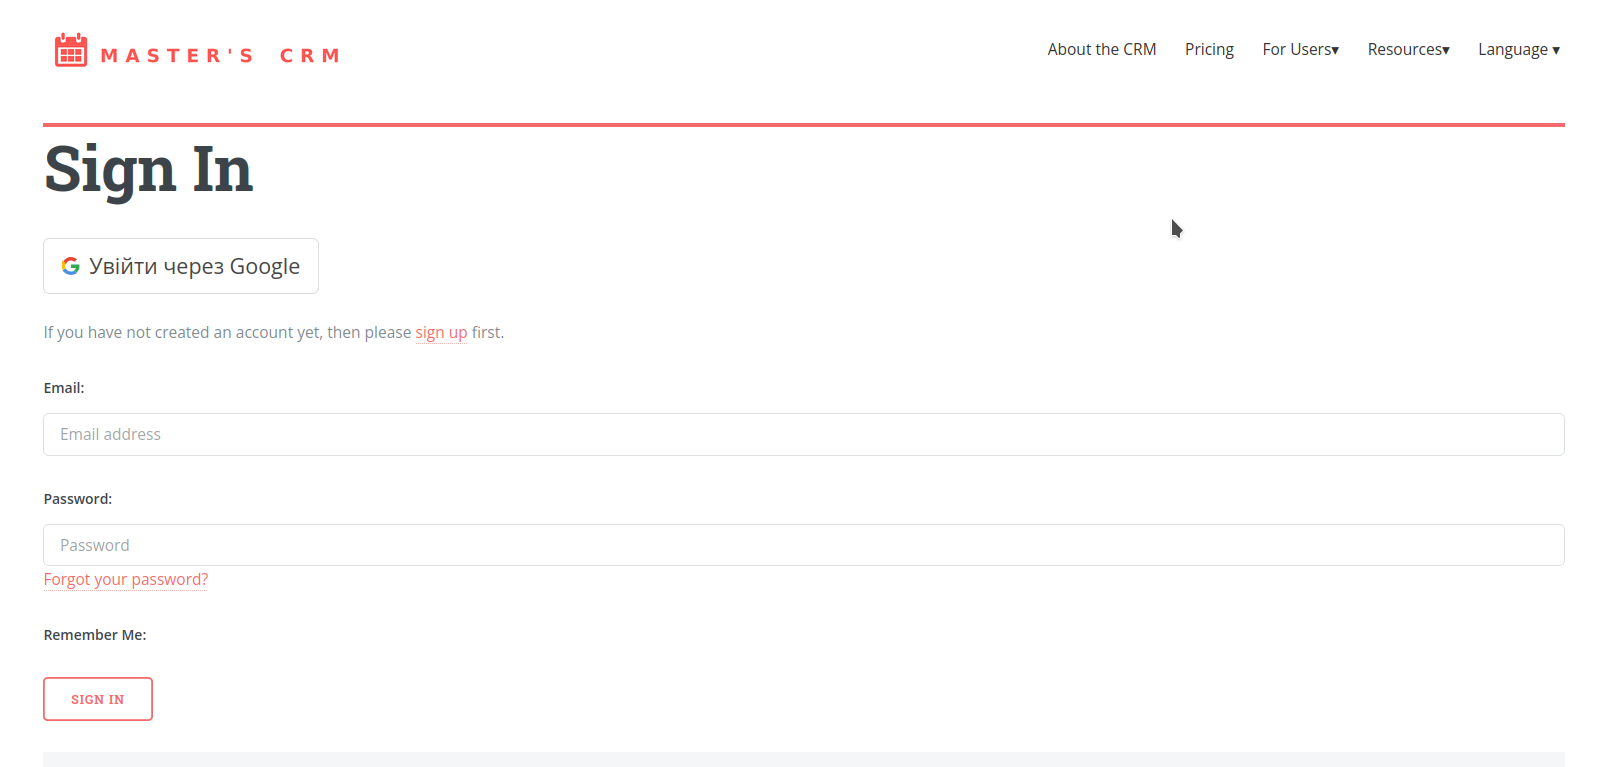
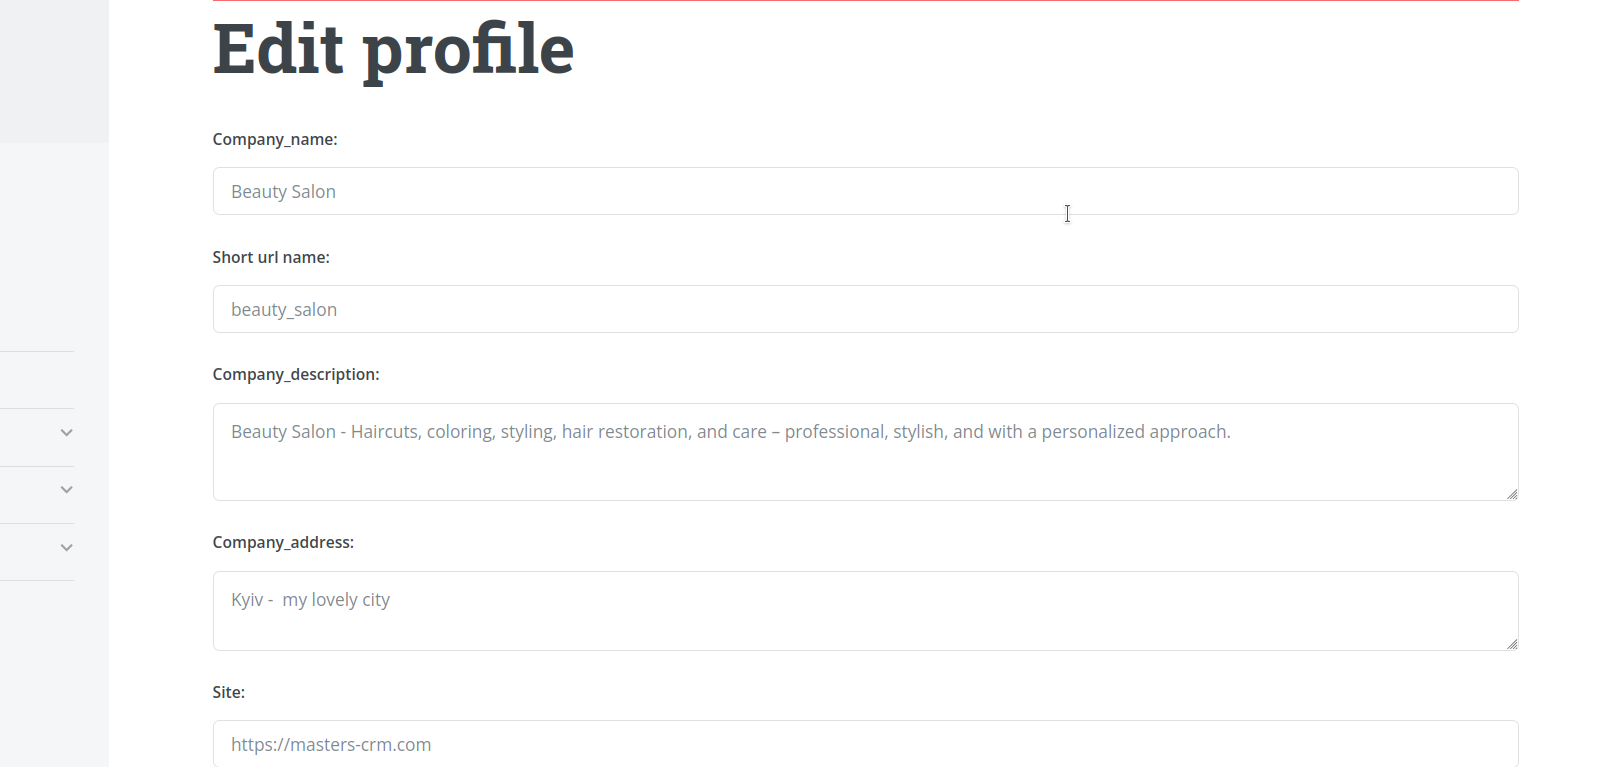
2. Set Up Your Profile
Add information about your company, contact details, logo, and photos. This helps clients easily find you.
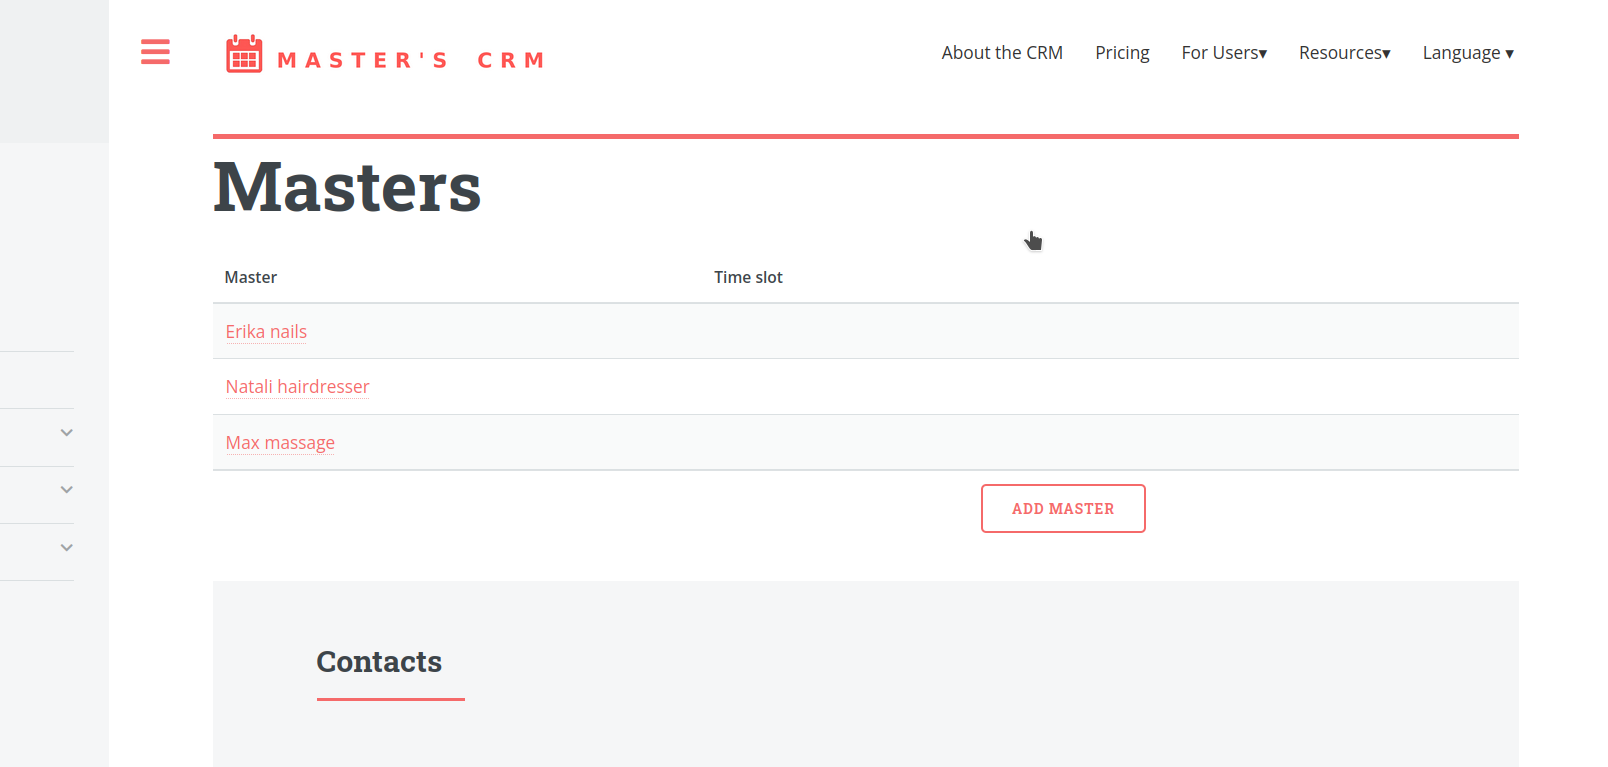
3. Add Masters
Add your team members and assign services to each of them. Every master can work on their own schedule and manage their appointments in a personal calendar.
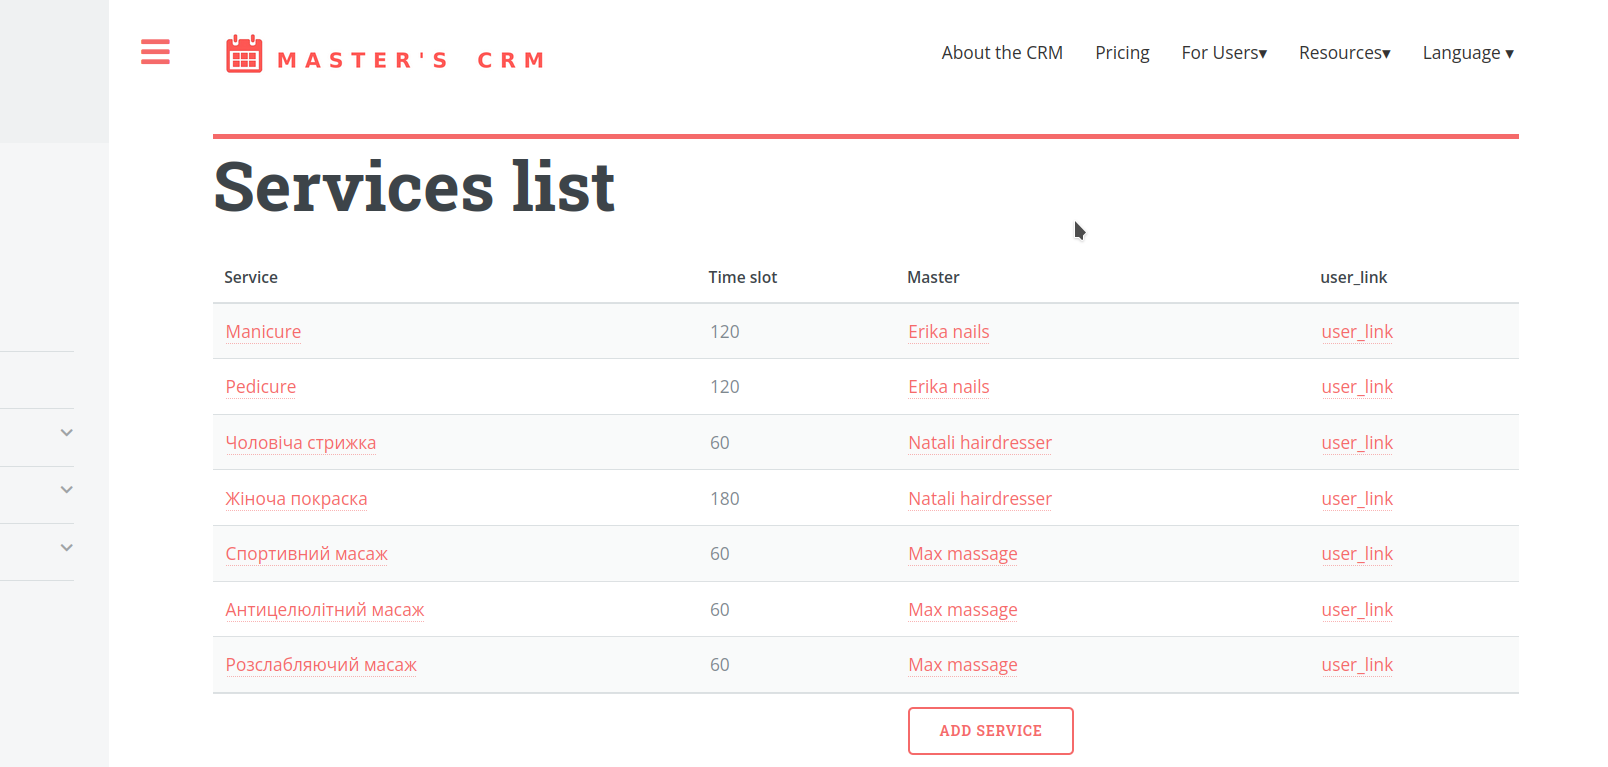
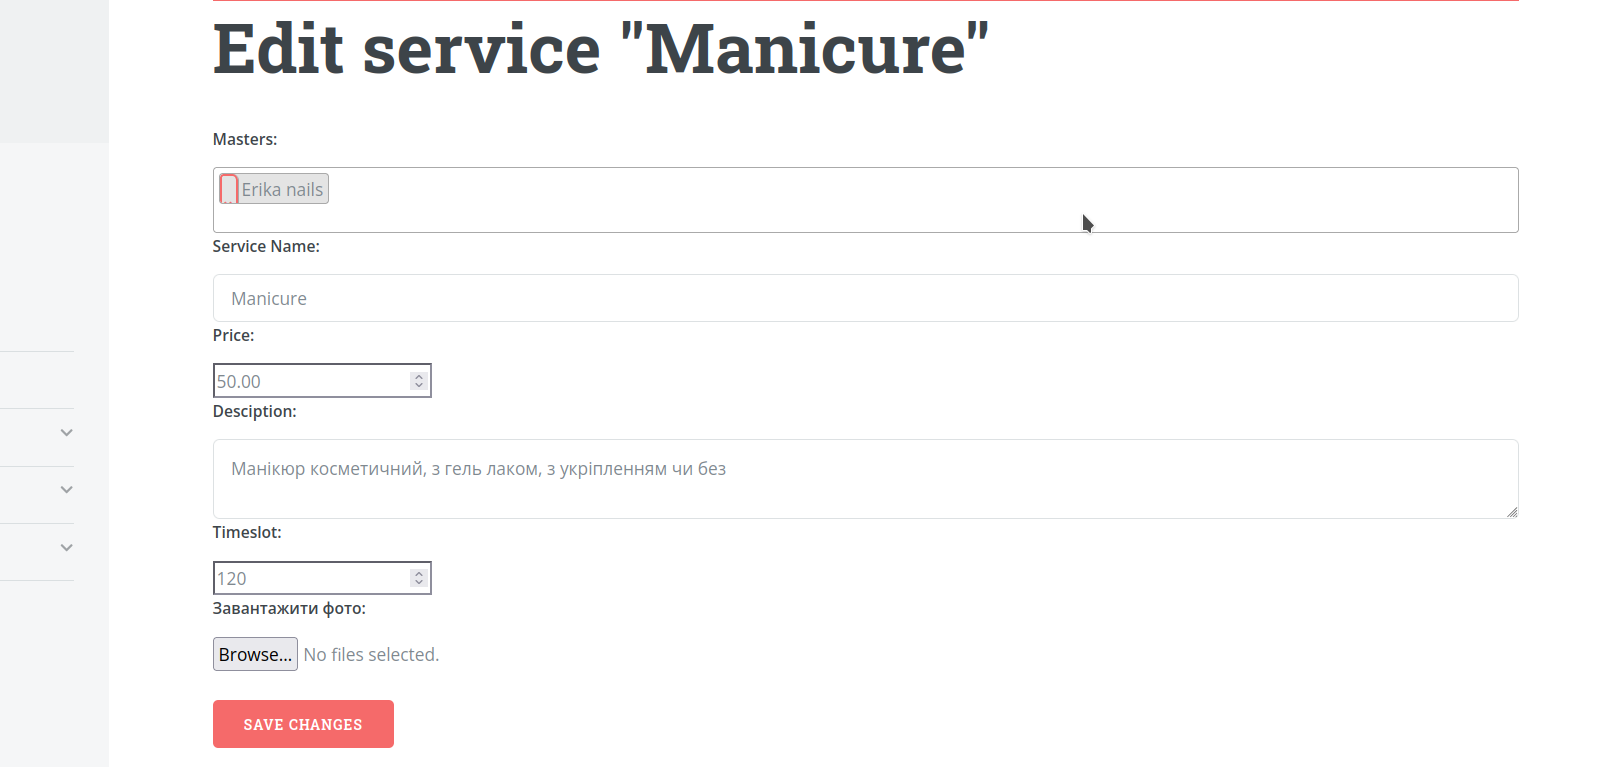
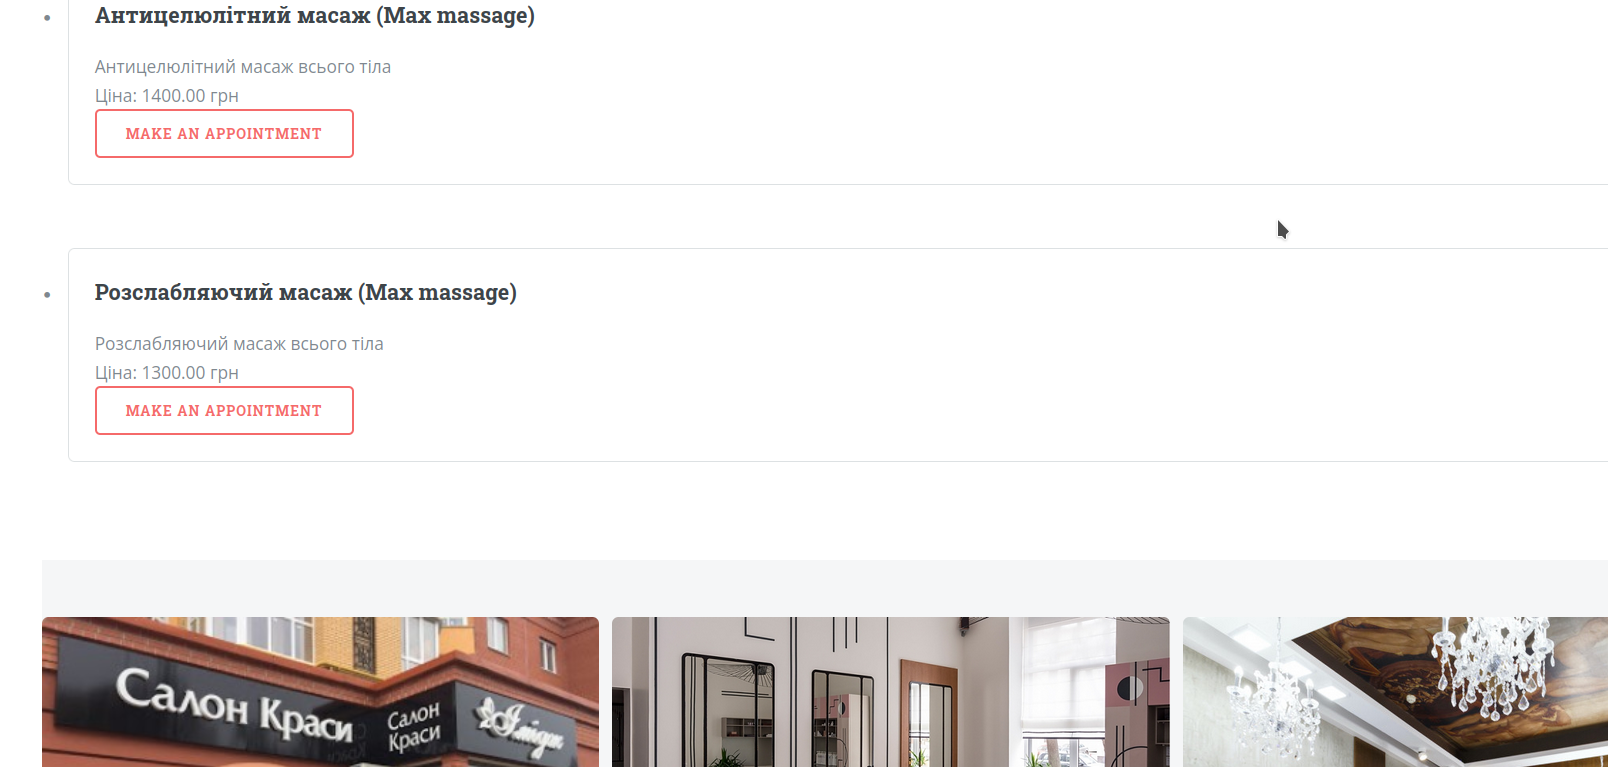
4. Add Your Services
Create a list of services with prices and durations. You can group them by category to make it easier for clients to choose.
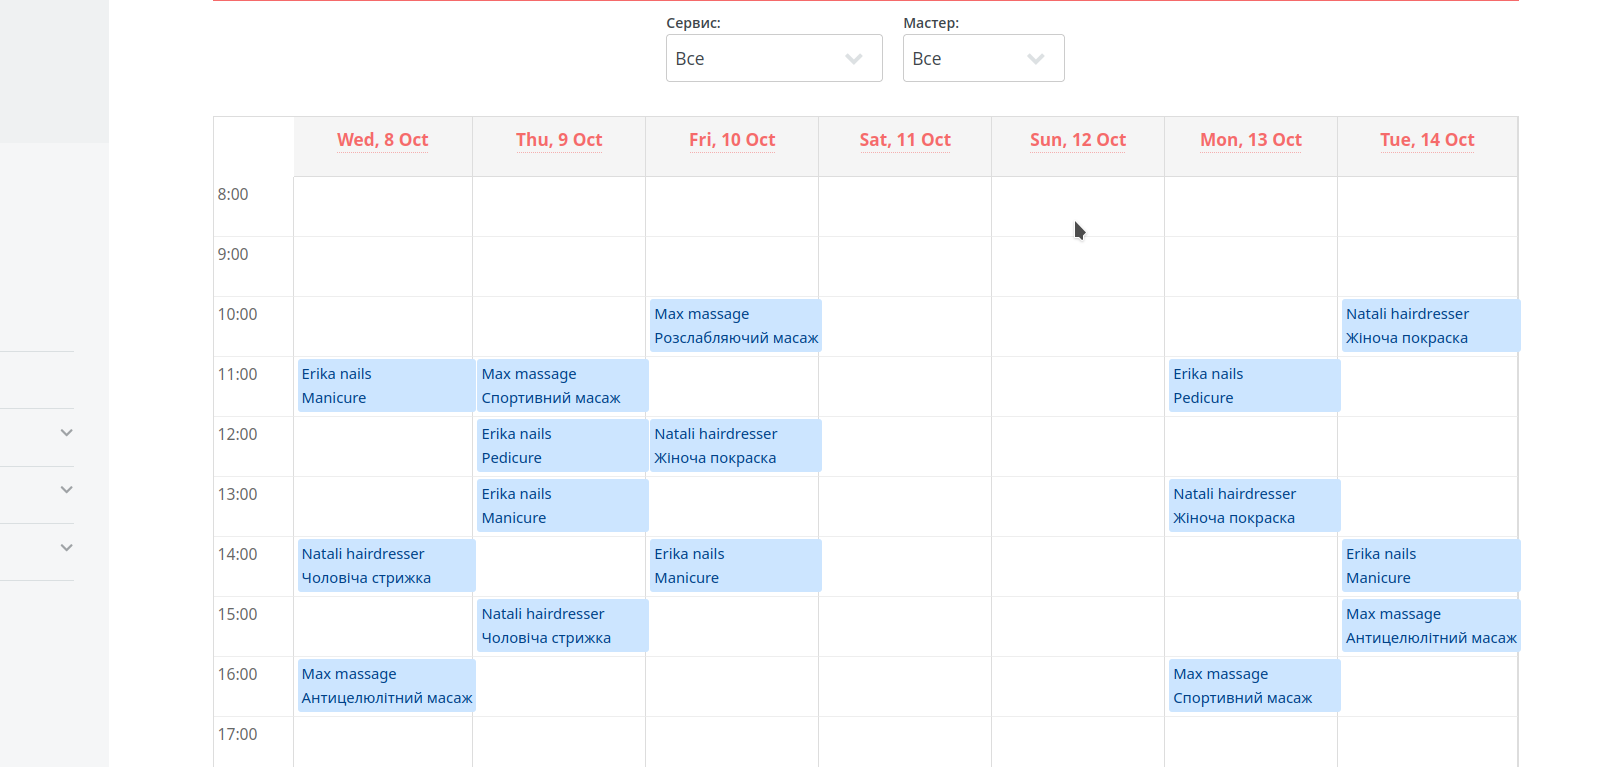
5. Manage Appointments in a Convenient Format
Filter by service, by master, or view the full schedule overview.
6. Get Your Own Personal Page with Services
You’ll immediately get your own public page with company information, photos, and a full list of services — plus an option for clients to book online without administrator involvement.

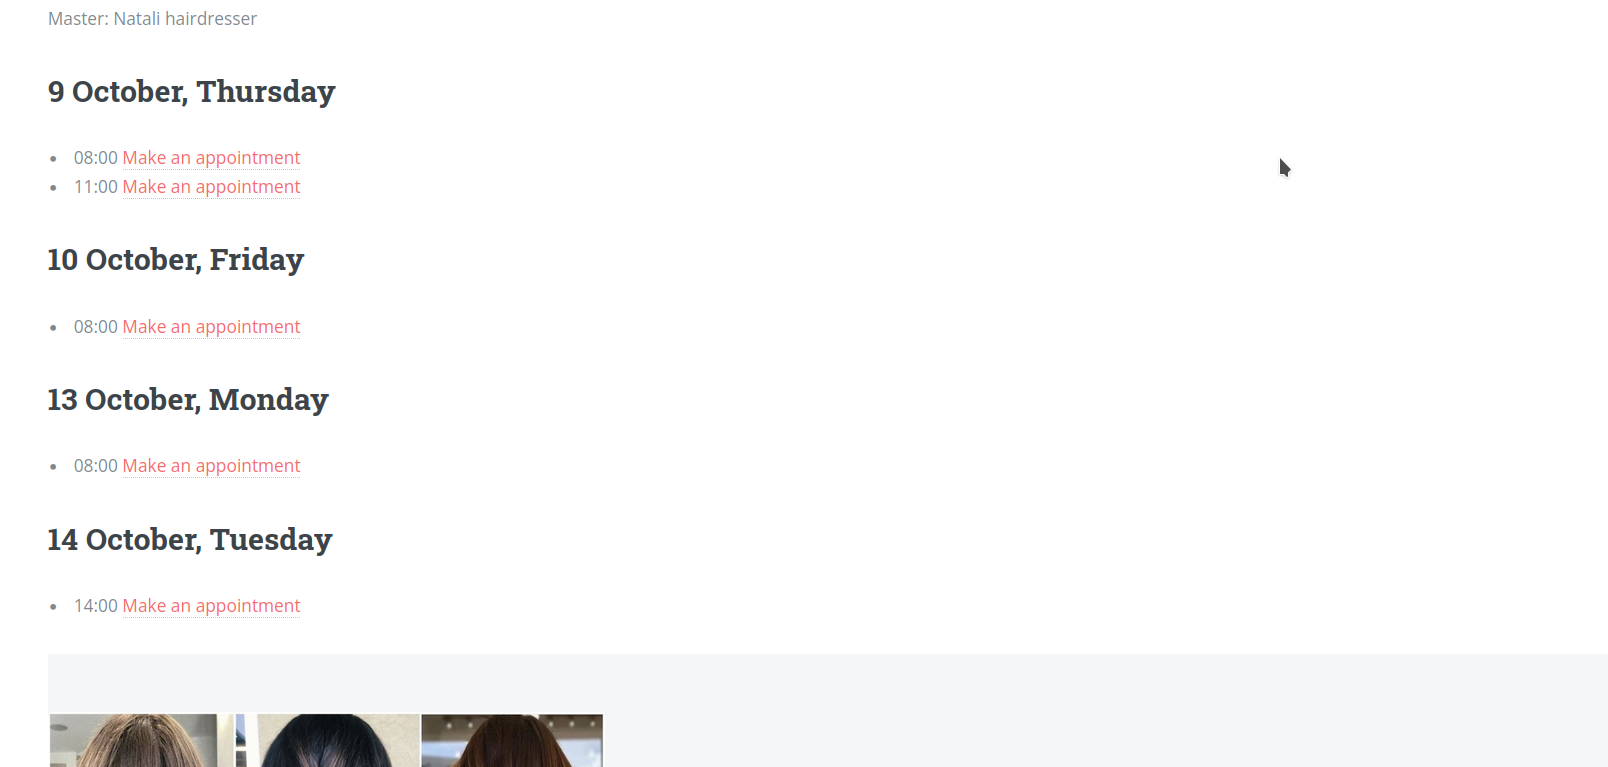
7. Accept Online Bookings
Clients can choose a service, time, and master in just a few clicks. All bookings will automatically appear in your calendar.

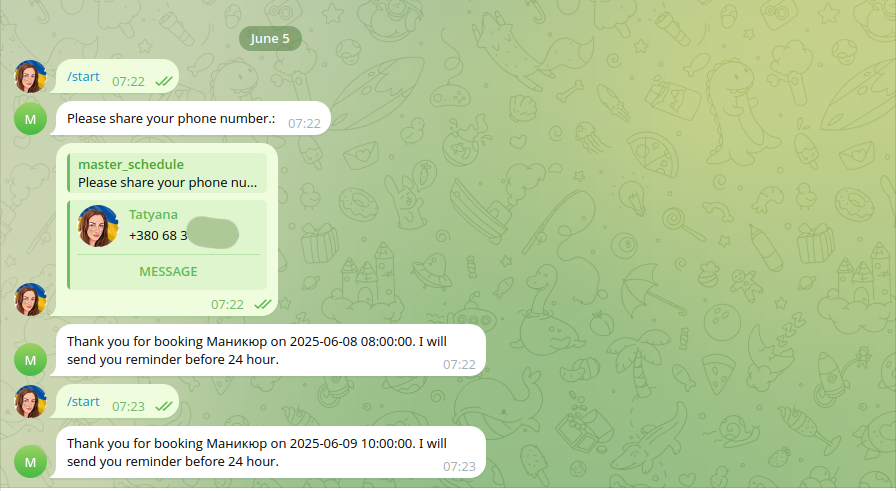
8. Use Reminders
The system automatically sends messages to clients via messenger so they don’t forget their appointments.
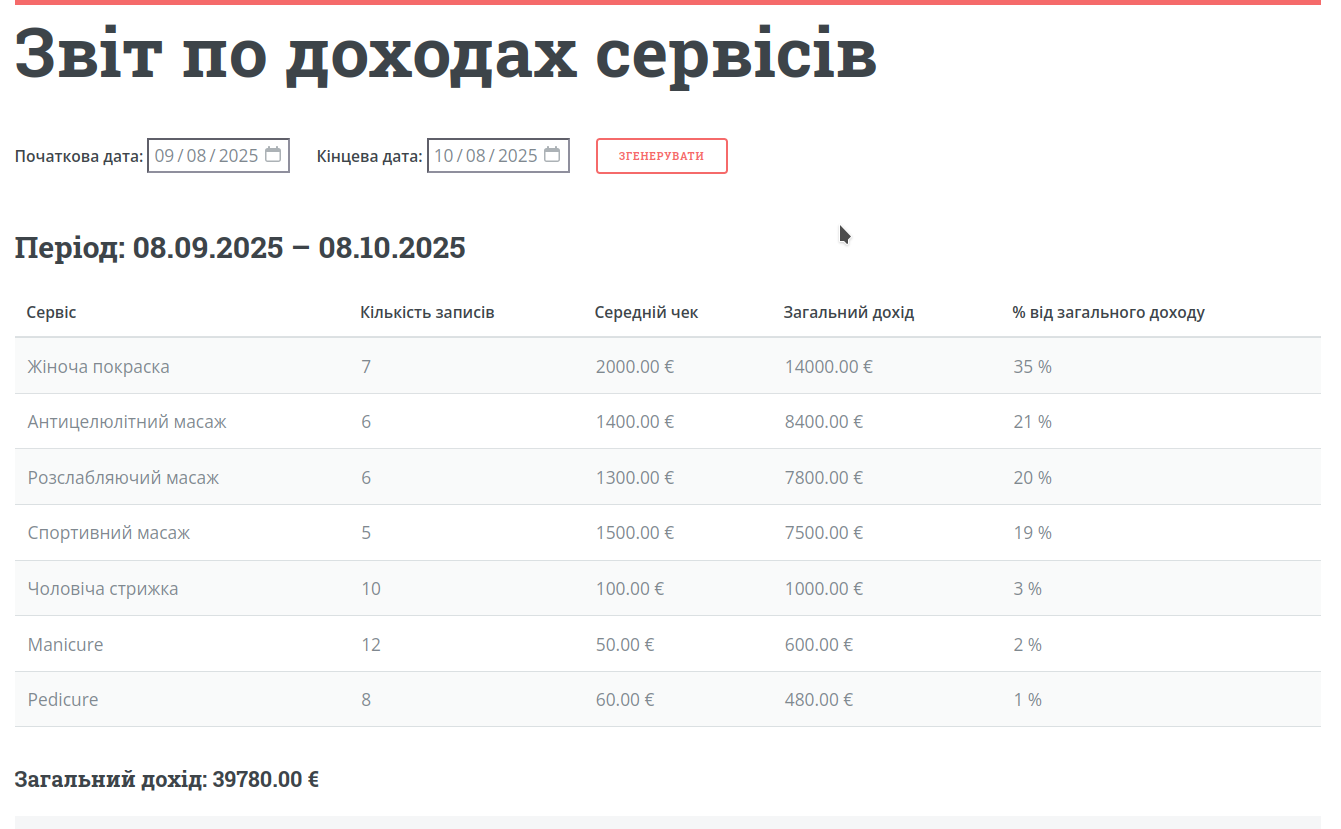
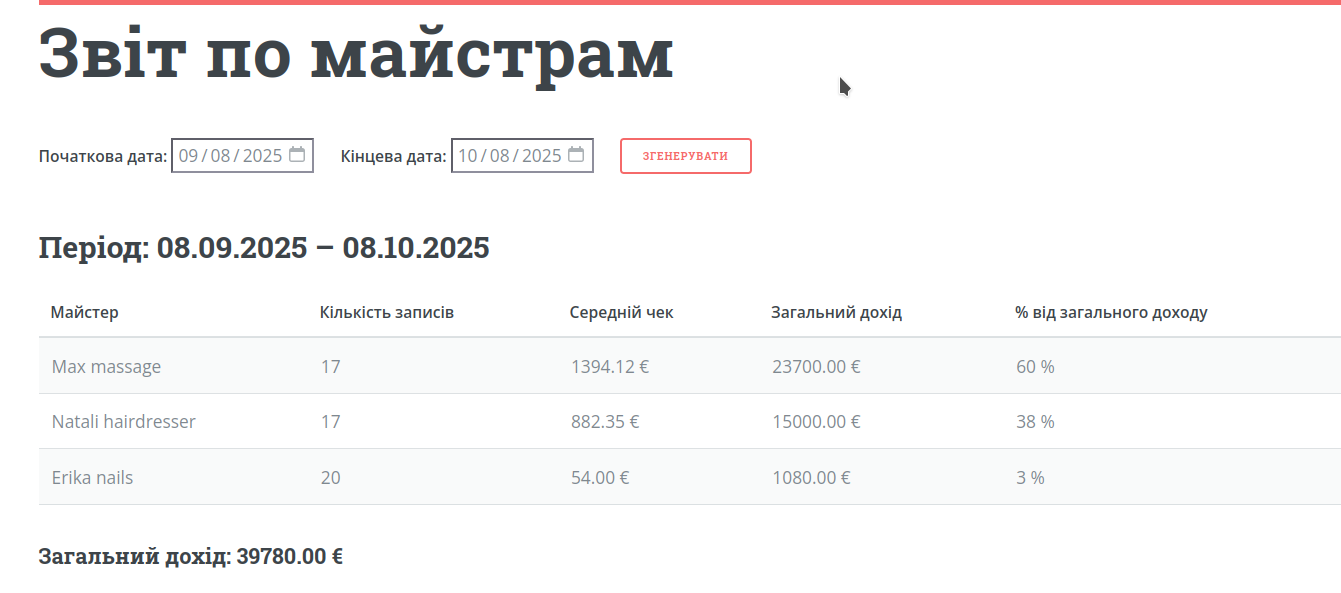
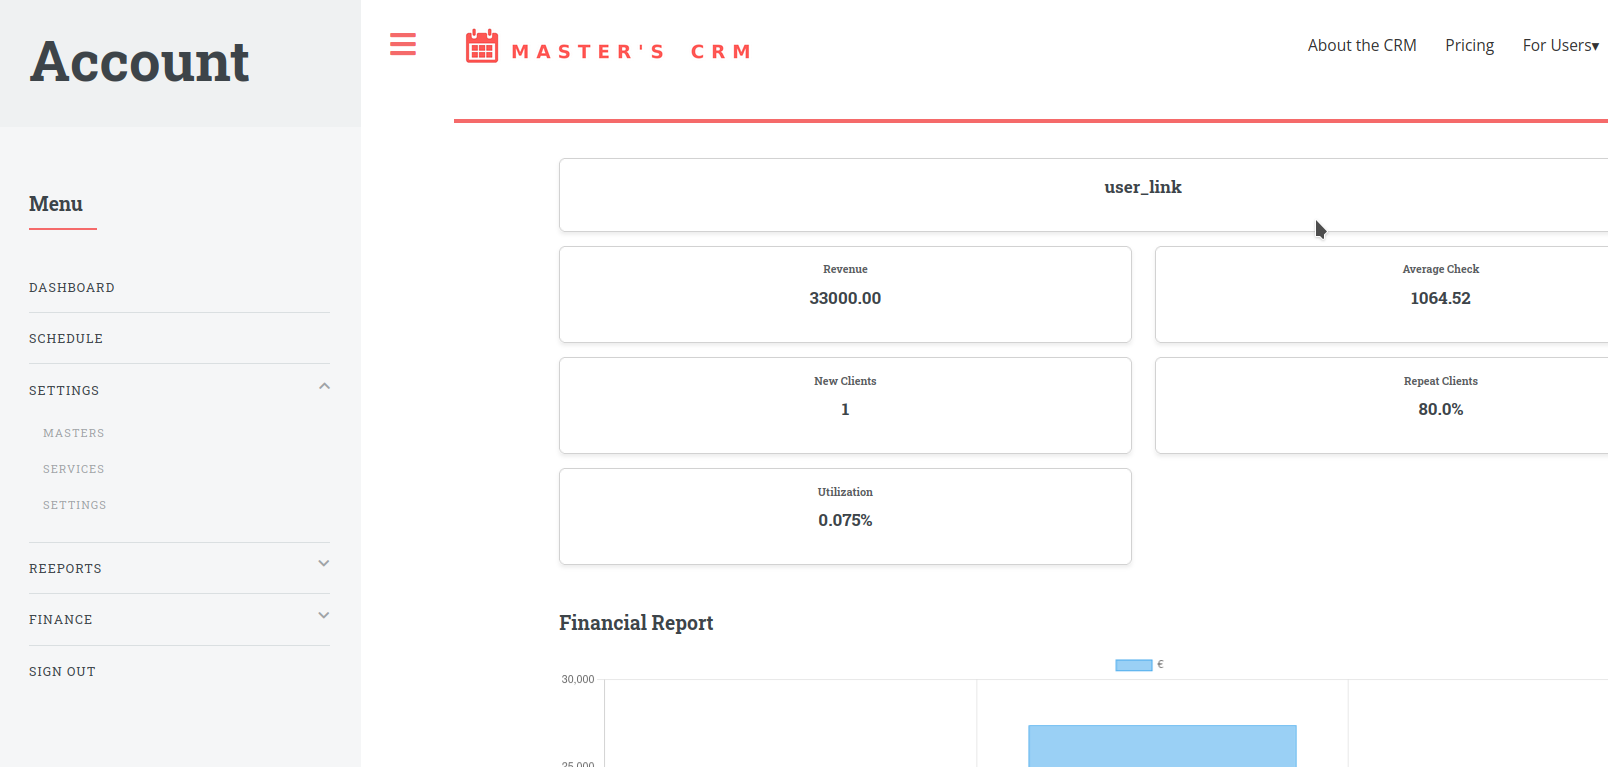
9. Get Reports and Analytics
Analyze your financial reports broken down by masters, services, and clients. This helps you understand which services to expand, which masters generate the most income, and who your most loyal clients are.