How to set up a work schedule
The work schedule defines when clients can book appointments with a master.
The system uses this schedule to generate available time slots.
How the schedule works
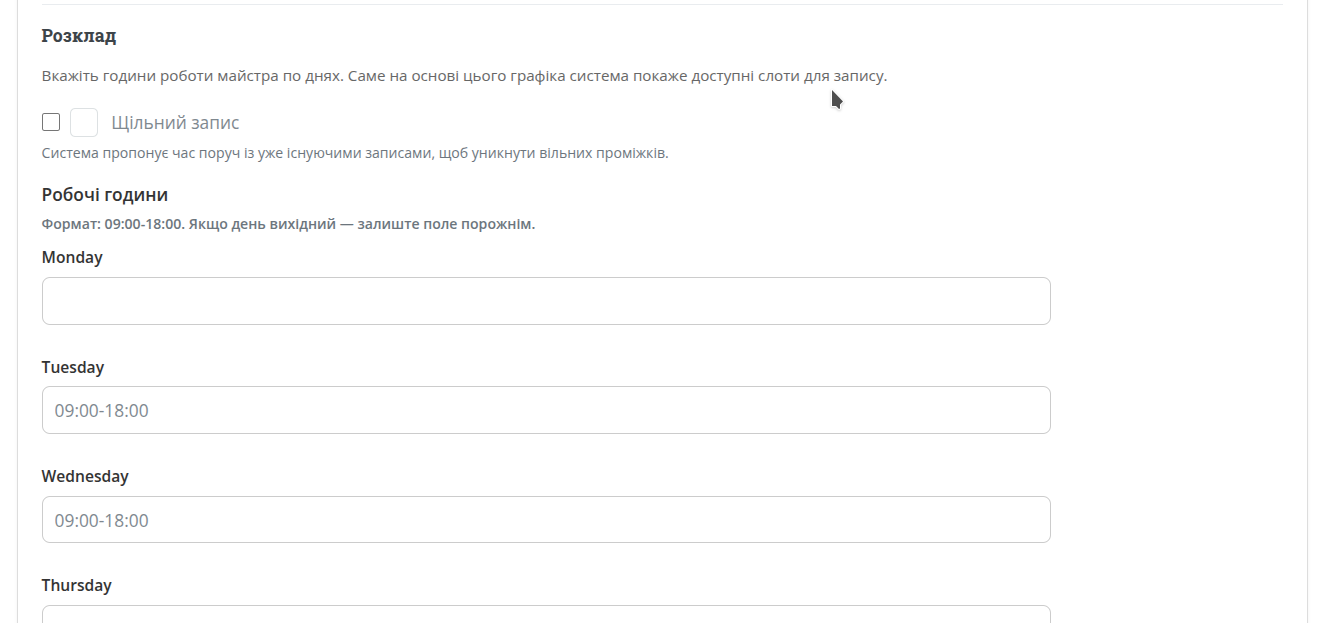
You define working hours for each day of the week. For example:
- Monday: 09:00–18:00
- Tuesday: 10:00–19:00
- Sunday: day off (leave empty)
The system automatically splits this time into slots based on service duration.
How to set up the schedule
Step 1. Select a master
Each master has their own individual schedule.
Step 2. Set working hours
Enter time for each day in the format 09:00-18:00.
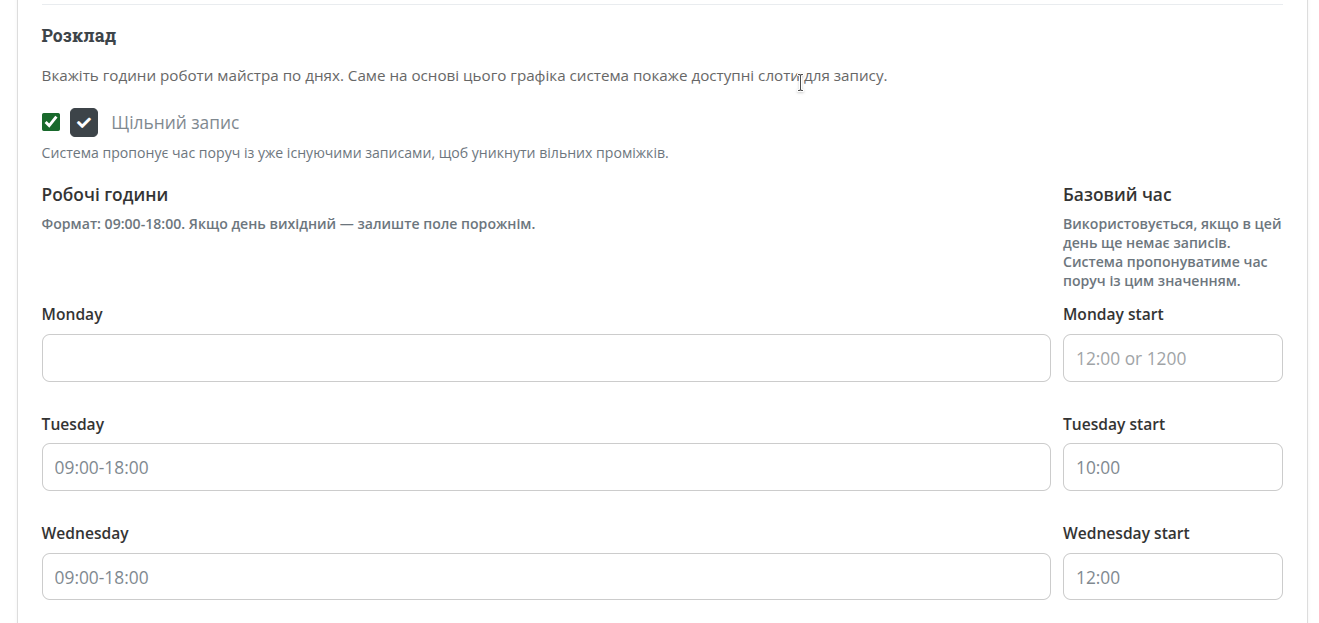
Step 3. If dense booking is enabled — set a base time
The base time will be used as a starting point when there are no existing bookings.
Step 4. Save changes
After saving, the system will immediately use this schedule for bookings.
How dense booking works
This mode helps organize bookings without gaps.
- It does not show all available slots at once, only those near existing bookings;
- If there are no bookings, the system uses the base time and suggests slots around it;
- If no base time is set and there are no bookings, the full day will be available;
- This mode is useful for beginners, as clients don’t see how much free time you actually have.
How bookings are generated
Service duration
Each service has its own duration (e.g., 30 or 60 minutes), which defines the slot size.
Available slots
The system shows clients only free time slots without conflicts.
Automatic updates
When a new booking is created, that time becomes immediately unavailable for others.
Useful tips
Check it as a client
After setup, open your public page and see which times are available. Try different modes and see how they appear.
What’s next
Once the schedule is set up, the next step is to add services. Together with the schedule, they create a complete booking system.